


Brake pads are a crucial component of your vehicle’s braking system, playing a vital role in ensuring safety on the road. Over time, these pads wear down due to friction, which can lead to decreased braking efficiency and potentially hazardous driving conditions. Understanding when and how to replace your brake pads is essential for any driver looking to maintain optimal vehicle performance and safety.
Regular brake service is imperative to keep your vehicle functioning smoothly. The lifespan of brake pads can vary based on several factors, including driving habits, the type of vehicle, and the quality of the pads used. Generally, it is advisable to inspect your brake pads every 20,000 to 50,000 miles, but your specific driving conditions may necessitate more frequent checks. Knowing the signs of wear can help you identify when it’s time for a replacement, preventing further damage to your braking system.
In this guide, we will explore the step-by-step process of replacing brake pads, as well as provide valuable tips on selecting the right type of pads for your vehicle. Whether you’re a seasoned DIYer or a novice looking to gain some mechanical knowledge, this guide will equip you with the information needed to ensure your brake service is performed correctly and safely.
Brake Pad Replacement Guide: How and When to Change Them
Changing brake pads is essential for maintaining the safety and efficiency of your vehicle. Brake pads are a critical component of the braking system, providing the necessary friction to slow down or stop your car. Regular replacement of pads is vital for optimal performance.
To determine when to change brake pads, pay attention to various indicators. A common sign is a squeaking or grinding noise when brakes are applied, which signifies that the padding has worn thin. Additionally, if you notice a decrease in braking efficiency or your vehicle pulls to one side while stopping, it may be time to check the brake pads.
Generally, brake pads should be checked every 20,000 to 50,000 miles, but this can vary based on driving habits and vehicle type. Frequent stop-and-go driving or harsh braking can lead to faster wear. Regularly inspecting pads for thickness can help you decide when to replace them.
When it comes to replacing brake pads, ensure you have the right tools: a car jack, jack stands, a lug wrench, and a socket set. Start by lifting the vehicle and removing the wheel. Then, locate the caliper that houses the brake pads. Detach the caliper, remove the old pads, and install the new ones. Make sure to compress the caliper piston to accommodate the new pads before reassembling everything.
Always consult your vehicle’s manual for specific instructions related to your make and model. Choosing high-quality brake pads can enhance performance and longevity, making it a worthwhile investment for your safety and comfort.
Identifying Signs That It’s Time for Brake Pad Replacement
Recognizing the signs that indicate your brake pads need replacement is crucial for maintaining vehicle safety. Here are the key indicators:
- Squeaking or Squealing Noise: If you hear a high-pitched noise when applying the brakes, it often means the brake pads are worn and need to be replaced.
- Grinding Noise: A grinding sound typically occurs when the brake pads are severely worn down. This sound indicates that the pads have made contact with the brake rotor and should be replaced immediately to avoid further damage.
- Vibration or Pulsation: If you feel vibration through the brake pedal, it may indicate uneven wear on the pads or problems with the rotors, necessitating replacement or service.
- Reduced Braking Performance: If you notice a longer stopping distance or a lack of responsiveness when applying the brake pedal, it could be a sign that the brake pads are failing.
- Dashboard Warning Light: Many modern vehicles have a warning light that illuminates when brake pads are worn. Always pay attention to dashboard indicators.
- Thinning Pads: Regularly check the thickness of your brake pads. If they are less than a quarter of an inch thick, it’s time for a replacement.
Addressing these signs promptly can enhance safety and prolong the life of your braking system. Regular inspections and maintenance are essential to ensure that your brake pads function correctly.
Step-by-Step Process for Changing Brake Pads
Changing brake pads is essential for maintaining your vehicle’s braking performance. Follow this step-by-step guide to ensure a proper replacement process.
Step 1: Gather Necessary Tools and Materials
Before beginning, collect all required tools, including a jack, jack stands, lug wrench, socket set, and a c-clamp. Also, have your new brake pads and any needed lubricants ready.
Step 2: Prepare the Vehicle
Park your vehicle on a flat surface, engage the parking brake, and turn off the ignition. Loosen the lug nuts slightly while the car is still on the ground to make removal easier later.
Step 3: Lift the Vehicle
Using the jack, lift the vehicle until the wheels are off the ground. Secure it with jack stands for safety. Remove the loosened lug nuts completely and take off the wheel.
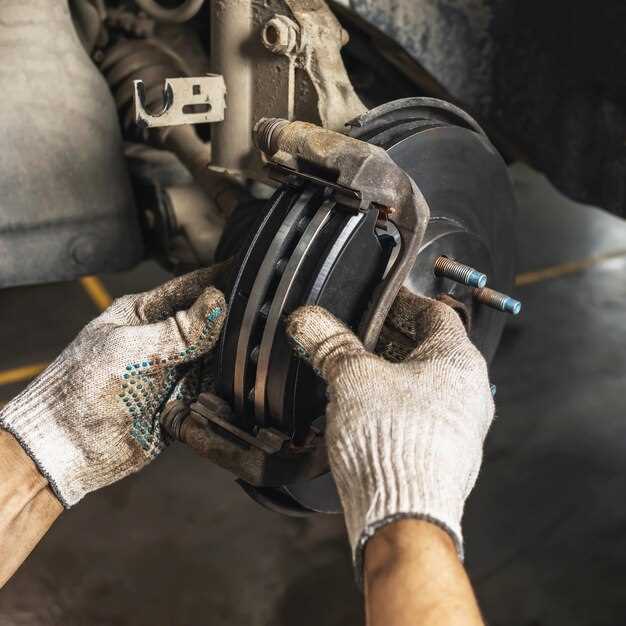
Step 4: Access the Brake Caliper
Locate the brake caliper, which houses the brake pads. Depending on your vehicle, you might need to remove bolts or clips securing it. Carefully detach the caliper without straining the brake line.
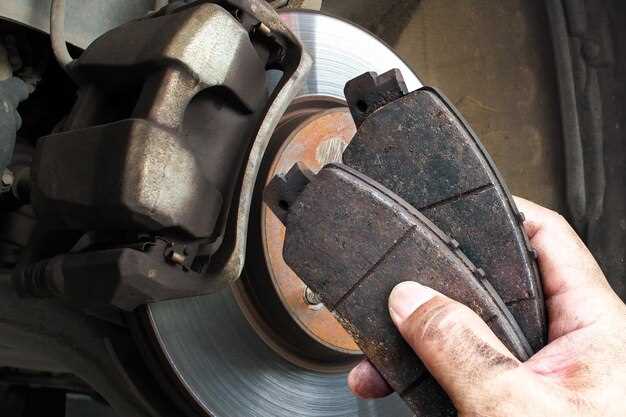
Step 5: Remove Old Brake Pads
Once the caliper is removed, take out the old brake pads. They may be held in place by clips or pins, so ensure you remove these components carefully.
Step 6: Prepare Caliper for New Pads
Use the c-clamp to compress the caliper piston back into its housing. This step creates enough space for the new, thicker brake pads. Ensure the piston moves smoothly into position.
Step 7: Install New Brake Pads
Insert the new brake pads into the caliper bracket. Ensure they fit snugly and are correctly oriented. Reinstall any clips or pins that hold the pads in place.
Step 8: Reattach the Brake Caliper
Carefully reposition the brake caliper over the new pads and secure it by tightening the bolts. Ensure the caliper is aligned properly with the mounting bracket.
Step 9: Reinstall the Wheel
Place the wheel back onto the hub and hand-tighten the lug nuts. Lower the vehicle back to the ground, then fully tighten the lug nuts in a star pattern for even distribution.
Step 10: Test the Brakes
Before driving, pump the brake pedal several times to re-engage the caliper and position the brake pads against the rotors. Check for any unusual noises or issues before taking your vehicle on the road.
Following these detailed steps will help ensure your brake pads are changed effectively, contributing to your vehicle’s safety and performance.
Selecting the Right Brake Pads for Your Vehicle
Choosing the correct brake pads is crucial for optimal vehicle performance and safety. Start by consulting your vehicle’s service manual to identify the specifications and recommendations provided by the manufacturer. This ensures compatibility and helps maintain the integrity of your braking system.
Consider the type of driving you do. For everyday driving, semi-metallic pads offer a good balance of performance and lifespan. If you frequently drive in high-performance conditions or tow heavy loads, ceramic pads may be a better option due to their heat resistance and lower dust production. For racing or track use, carbon composite pads can provide maximum stopping power but may wear out quicker.
Additionally, pay attention to the friction material and its durability. Higher friction typically means better stopping power but can also lead to quicker wear on rotors. It’s essential to find a pad that balances performance with longevity to avoid frequent replacements.
Lastly, consider your budget, but remember that cheaper options may compromise safety and performance. Investing in quality brake pads from reputable brands can save you money in the long run by reducing the need for frequent service and ensuring reliable braking capabilities.